


DIY - How To Install An Undersink Reverse Osmosis System
By purchasing a reverse osmosis system online and installing the system yourself, you can save a ton of money. That's why we offer as many DIY resources as possible for our customers. In this blog, we will be going over how to install an undersink reverse osmosis system. Please keep in mind that if space is an issue this system can also be installed in a basement or other location. However, if this is the case a permeate pump option is recommended for added pressure. And to avoid damage, never install in a location where temperatures fall below freezing.
Before we start with the installation steps, let's take a look at the tools you'll need:

- Adjustable Wrench
- Drill
- Philips Head Screw Driver
- ¼ Drill Bit
- 7/16 Drill Bit
Starting the Install
- First, let's start with the faucet. The RO faucet should be placed near the sink where drinking and cooking water is used. A 2-inch flat surface space is required to mount the faucet. Note*: the thickness of the mounting surface should not exceed one inch and a quarter. If the sink has a sprayer it can be disconnected for the faucet installation, if not you will have to do a manual install. Keep in mind though if you have a Granite, Quartz, or any kind of stone countertop that can crack or split, you may want to consider having a professional drill the faucet hole.
- Before drilling the hole, check under the sink to make sure you have space and will not be interfering with anything like plumbing. Drill a 7/16th hole, making sure the drill bit is compatible with the surface material. Once you have your hole, you can begin mounting the faucet.
- Place the base plate followed by the rubber washer onto the faucet and place it into the drilled faucet hole. The faucet should be positioned so it empties into the sink and the spout swivels freely for convenience. Underneath the sink attach the flat washer, followed by the star washer and then the Hex nut. Tighten the nut until the faucet is secure. Note* It may easier to have someone hold the faucet while you tighten the nut.
- Now attach the faucet adapter to the threads. Make it hand tight and then give it an extra half-turn with a wrench. Do not apply Teflon tape to this fitting.
- Next, you will install the Feed Water Angle Stop Valve.
- Turn off the cold water supply valve for the sink faucet.
- Next, open the sink faucet cold water to relieve the pressure. Remove the sink faucet tubing from the shutoff valve. Be sure to have a towel to dry any water that is spilled. Now install the angle stop valve on the sink faucet shutoff valve and tighten it. Don't worry about the angle stop valve position because it will swivel and can be positioned later.
- Now install the tubing on the angle stop valve and tighten.
- Be sure the blue handle on the angle stop valve is in the closed position. Now open the sink shutoff valve and check the angle stop connections for leaks. If there are leaks, repair them now.
- Now you can install the Drain Saddle.
- Drain saddle valves are designed to be installed on a standard 1 1/2 inch PVC drainpipe. Install the drain saddle valve above the trap on the vertical or horizontal tailpiece. Never install a drain saddle valve close to the outlet of garbage disposals because it may result in the plugging of the drain line.
- Position the port side of the drain saddle valve at the selected location to judge where to drill your opening. If the pipe is horizontal make sure to never position the opening at the bottom. A side or top position is recommended. Install the rubber gasket on this half of the drain saddle. Be sure the gasket hole is lined up with the porthole.
- Drill a 1/4 hole through one side of the pipe. BE CAREFUL not to drill through both sides of the pipe.
- Position both halves of the drain saddle on the drain pipe. A good tip is to use a drill bit or screwdriver to check that your drilled hole and the drain saddle port are lined up.
- Secure the drain saddle clamp on the valve with the provided bolts and nuts. Make sure not to over tighten, just make it snug.
If you purchased your reverse osmosis system from us, then you have all the parts you need to begin the installation. Pictured below is an example of what comes with our best selling reverse osmosis system - The All American Reverse Osmosis System.
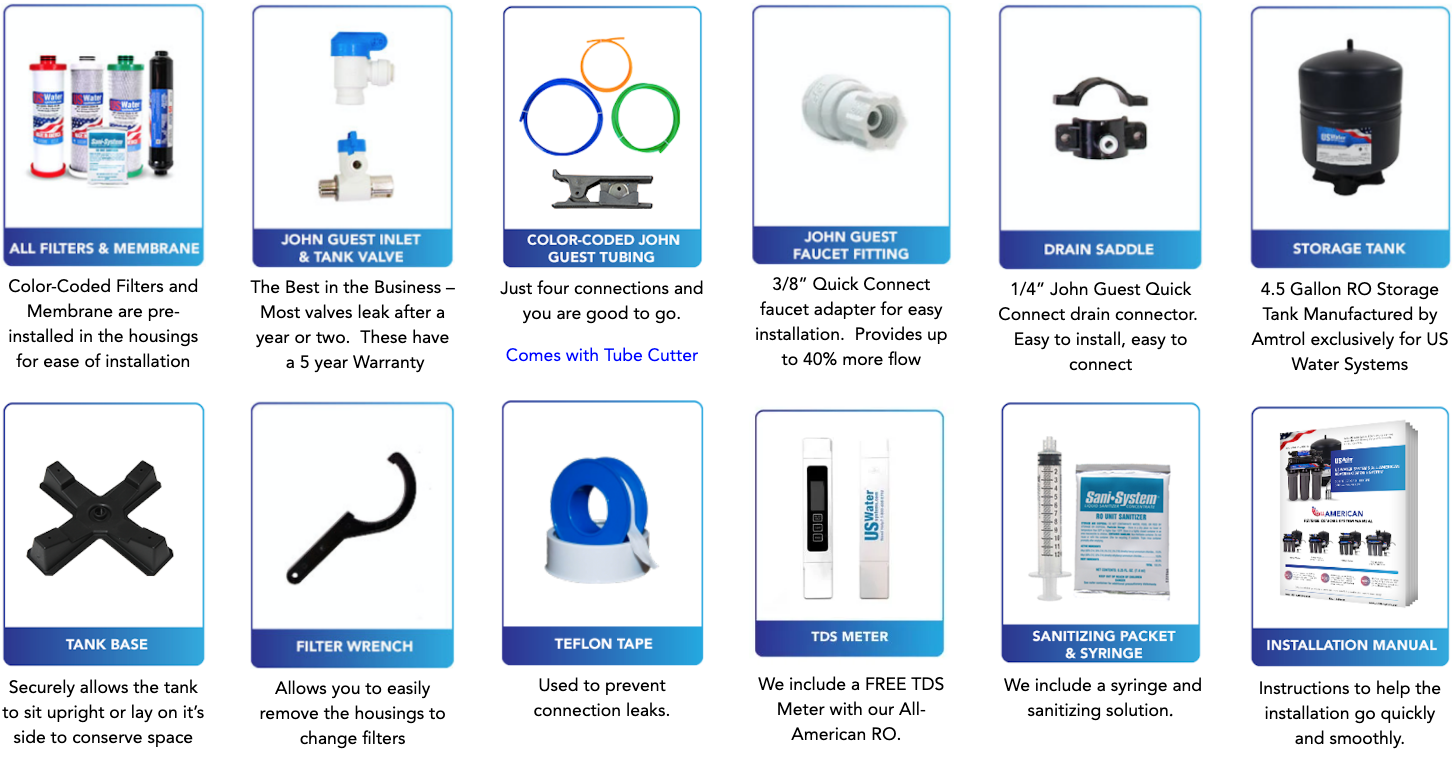
Reverse Osmosis System Installation Kit
The Final Stretch
- Apply Teflon tape to the Tank outlet threads. About 6 wraps are sufficient.
- Install the tank valve by turning it clockwise. Making it hand tight is usually adequate. Be careful not to overtighten the valve.
- Now that all of that is done we can now connect the tubing.
- Here's a tip, you may want to leave the access tubing and not cut it. This will allow space to pull the unit out of the cabinet for filter changes without having to disconnect the tubing.
- The blue line goes to the faucet connector. Make sure all tubing is firmly pushed in place. You should feel it sink snuggly into place.
- All tubing can be cut to your desired length with the included tubing cutters, but keep in mind it is a good idea to leave a decent amount of slack. This will allow space to pull the unit out of the cabinet for filter changes without having to disconnect the tubing.
- The Blue line goes to the faucet connector. Make sure all tubing is firmly pushed in place. You should feel it sink snuggly into place. Run the other end of the line to the outlet found on the polishing filter.
- The Orange line goes from the angle stop valve to the inlet on the sediment filter housing.
- The Black tube is your drain line. The end with the flow restrictor will run to your system into this port on the Membrane. Note, if you have a system with an optional permeate pump, you will run the line to the Brine out port on the pump. The other end of the line goes to the drain saddle.
- Lastly, the Green line goes from your tank to the inlet on the polishing filter.
- Now that everything is connected place your RO system and tank in its desired location.
- With the system in place, you can now begin the startup.
- Check all connections to be sure they are secure, and make sure red retention clips are in place on every John Guest fitting.
- Make sure the valve on the storage tank is in the off position. Now Slowly, with little pressure at a time, open the angle stop valve. With water now running through the system, check for leaks.
- Open the RO faucet until a steady stream of water flows. The initial water from the system may be discolored. This is normal.. It is simply the excess carbon flushing out of the system from the carbon filters. Once there is a steady stream of water coming from the faucet close faucet and wait five minutes to see if any leaks result in the entire system.
- If there are no leaks, open the storage tank valve allow the system to fill. Most systems will be full within 2 hours. The system is full when the water to the drain stops. Check for leaks with the system full. If there are, turn off the water and repair them accordingly.
- You should open the faucet and drain the tank after it fills up. After it fills up a second time, do it again, just to flush the system out thoroughly. Your installation is now complete and you are ready to enjoy your new RO system. Keep in mind that filters and the membrane will need to be changed annually. The filters usually need to be replaced once a year and the membrane once every two to five years, depending on water quality and usage. If you purchased an All American RO, then the TDS meter that is included with your system will help you determine when the membrane needs replaced. In extreme instances with bad water, the filters may need to be replaced every six months.
Reverse Osmosis FAQ
Is Reverse Osmosis Water Healthy For The Human Body?
The short answer is yes!
Now the long answer:
Reverse osmosis removes the largest spectrum of contaminants at the most economical cost of any water treatment process. Essentially, a reverse osmosis system will remove 98 to 99% of most contaminants including total dissolved solids (TDS), sodium, chloride, sulfate, nitrate, arsenic, and a plethora of other chemical and organic contaminants. If you are worried about the demineralization of your water then you can always add a Livation chamber post-filtration.
Livation Hydration Chamber does the following :
- Increases the pH of the filtered water typically to between 8.5 - 10.0
- Changes the oxidation-reduction potential of the water (ORP) to between -100mV and -200mV
- Reduces the sizes of the clusters of water molecules (re-structures) so that the water is easily absorbed into the body
- Puts beneficial alkaline minerals into the water, such as calcium, potassium, magnesium.
- Adds molecular hydrogen with antioxidant potential
Can I Add A UV To My Reverse Osmosis System?
Yes!
However, we don't recommend it for several reasons:
- There is generally no electricity under your sink
- It tends to heat up the water and can cause the plastic tubing and fittings to fail.
A quality reverse osmosis system is a combination of different high-performing components that work together to provide you with the purest water possible.
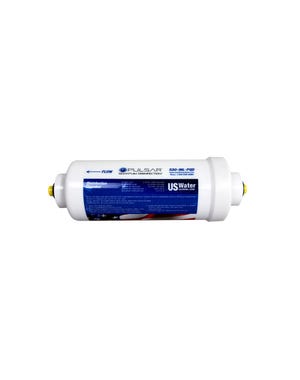
We recommend using a small efficient Pulsar Quantum Disinfection Cartridge for under sink RO applications.
Don't Reverse Osmosis Systems Waste A Lot Of Water?
Without a doubt, all reverse osmosis systems generate wastewater as a byproduct of water purification. The purified water (called permeate) is physically separated from the solution brimming with contaminants (called the brine) by the membrane. Most reverse osmosis systems on the market today produce clean water at a 4:1 ratio, meaning that 4 gallons of water is wasted for every gallon produced. The Reverse Osmosis Systems sold by US Water Systems typically produce clean pure water at a 2:1 ratio, meaning that it produces 1 gallons of water for every 2 gallons of water wasted. However, to put that in perspective, the average family uses a couple of gallons of water a day, which would mean that they might waste 6 gallons of water to produce clean water. To produce clean dishes in a dishwasher, you might use 12-20 gllons of water - clean dishes are important, but clean water is essential!
Can I Connect My Reverse Osmosis System To My Ice Maker Or Refrigerator?
Of course!! We recommend using a permeate pump if you plan on connecting your RO to an icemaker/refrigerator. We offer a non-electric high-pressure option for your reverse osmosis system. RO systems lose 30% to 40% of their pressure in the reverse osmosis process but not with this pump! You won't believe the pressure and volume when you use the non-electric permeate pump reverse osmosis system.
Do You Have A Contaminate List For What A Reverse Osmosis System Will Remove?
How about a table?
| Contaminant | Reduction | Contaminant | Reduction |
|---|---|---|---|
| Algae | 99.90% | Mercury | 98.00% |
| Aluminum | 98.00% | Mold | 99.90% |
| Amoebic Cysts | 99.00% | Nickel | 95.00% |
| Arsenic | 95.00% | Nitrate | 89.00% |
| Asbestos | 99.00% | Phosphate | 95.00% |
| Atrazine | 95.00% | Potassium | 95.00% |
| Bacteria | 95.00% | Protozoa | 99.00% |
| Barium | 97.00% | Radioactivity | 95.00% |
| Calcium | 99.50% | Sediment | 99.00% |
| Chloride | 95.00% | Selenium | 95.00% |
| Chlorine | 99.90% | Silicate | 89.00% |
| Chromate | 94.50% | Silver | 97.00% |
| Copper | 99.00% | Sodium | 94.00% |
| Cryptosporidium Cysts | 97.00% | Strontium | 97.00% |
| Cyanide | 97.00% | Sulfate | 95.00% |
| Fluoride | 98.00% | Thiosulfate | 99.00% |
| Giardia Lamblia Cysts | 99.00% | Trihalomethane | 98.00% |
| Lead | 97.00% | Volatile Organics | 95.00% |
| Manganese | 98.00% | Zinc | 97.00% |
| Magnesium | 97.00% | Z, 4-D | 95.00% |
1 comment
I had my well water tested and have 137 PPB of Manganese in it .
It now leaves a black film in our bath tubs when we drain it
what size water softener will I need that will remove this amount