


DIY - How To Install A Salt-Free Water Conditioner
Before Starting The Install - Here's Some Additional Information
The GreenWave, is a salt-free water softener alternative that rather than creating soft water, it suspends the hardness minerals in the water so that they do not stick to the plumbing and are flushed out the drain. It is a “green” alternative to a water softener as water is not wasted in a backwashing process and no salt is required for operation.
If you are a homeowner and decided to do your own installation, then this blog will help guide you through the steps. Before we begin, lets go over a few things to keep in mind regarding the incoming water.
Iron and Manganese - Just as with conventional water softening media, the GreenWave needs to be protected from excess levels of certain metals that can easily coat the active surface, reducing its effectiveness over time. Public water supplies rarely, if ever, present a problem but if the water supply is from a private well, confirm that the levels of iron (Fe) and manganese (Mn) are less than 0.3 mg/L and 0.05 mg/L respectively. Copper should be less than 1.3 mg/L
Copper - Copper can be present in the water if you are using new copper plumbing upstream of the GreenWave system. Copper in the water can be detrimental to the GreenWave media, so if this condition exists, we recommend waiting 3-4 weeks before placing the system in operation. This will allow the copper surfaces to be fully flushed and develop a natural protective surface. Once the plumbing connections are complete, place the GreenWave system in bypass for the recommended 3 to 4 week wait period before putting it into operation.
Chlorine - Chlorine is detrimental to the GreenWave media. If the feed water contains chlorine, it must be removed. Call a US Water Systems water specialist to purchase chlorine removal equipment.
Tool List
- Screwdriver
- Teflon Tape
- Razor Knife
- Two adjustable wrenches
- Additional tools may be required if modifications to home plumbing are required.
- To maintain full valve flow, be sure the plumbing size matches the size of the valve. The outlet pipe should be the same size or larger than the water supply pipe.
- Use copper, brass, or PEX pipe and fittings. Some codes may also allow PVC Plastic pipe.
Assembling Your Salt-Free Water Conditioner
1. Once the media has been installed, remove the funnel and duct tape from the distributor tube.
2. Place the salt-free water conditioner tank in the desired location. Typically this is at the water inlet of the home.
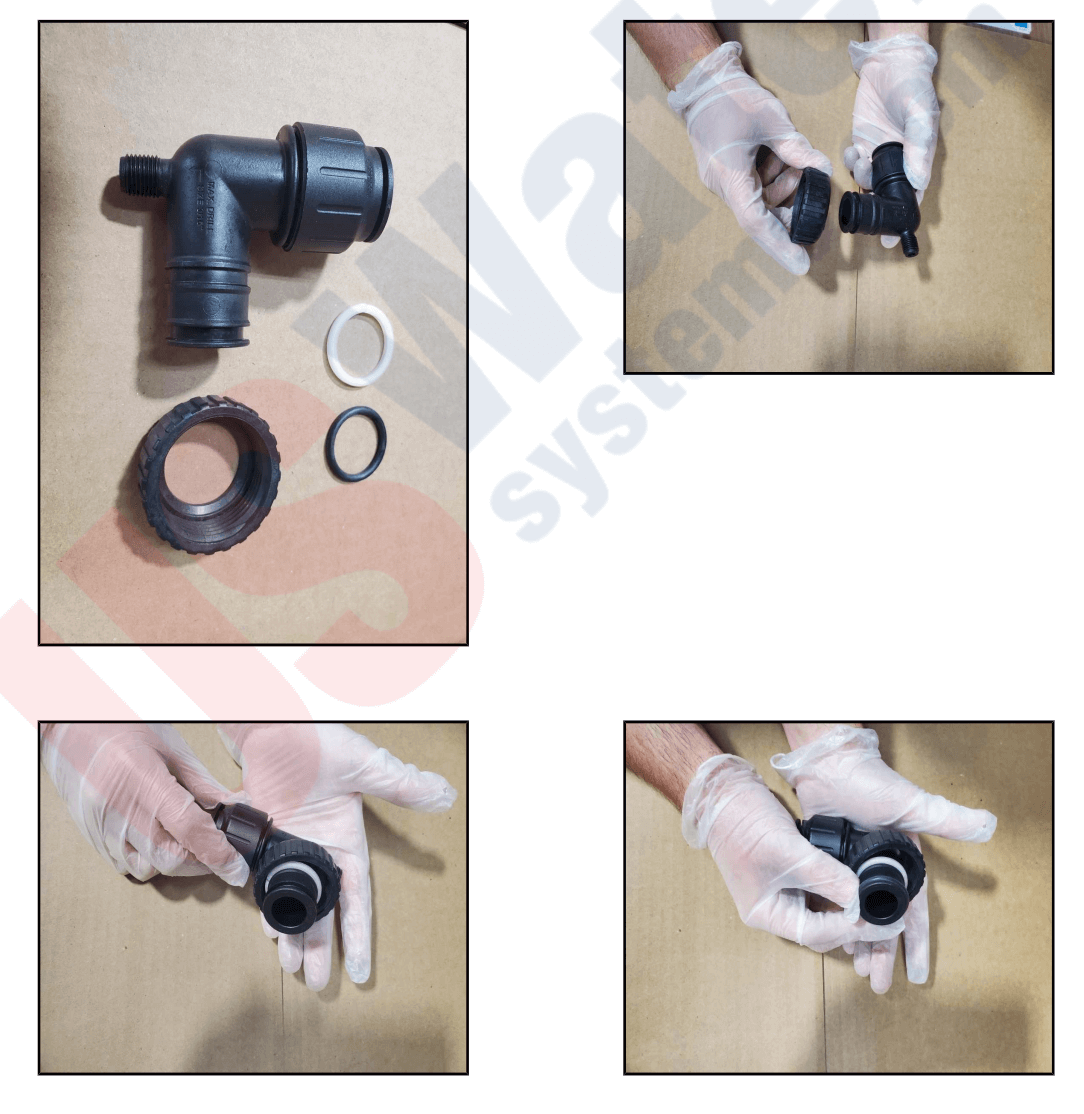
3. Prepare the tank connections by installing the nut on the elbow connector. Push the split white ring down over the elbow fitting to the second groove. Use the supplied silicone grease to lubricate the O-ring. Slide the O-ring over the elbow fitting and put it in the first groove. Make sure the O-ring is not twisted.
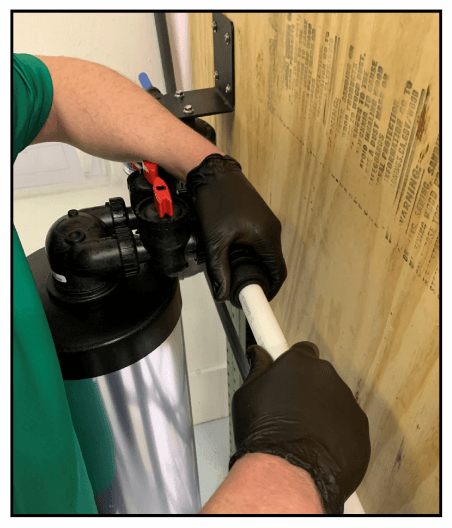
4. Lubricate the O-rings on the supplied bypass with the silicone grease. Install the bypass on the tank and fully tighten the retaining nuts. The bypass will move slightly once tight. It is made to flex and move and will not be rigid. Be sure the O-rings are lubricated on the elbow connectors previously assembled. Install the elbows in the bypass valve and tighten the retaining nuts. These will move when tight. They are made to flex just like the bypass valve connections.
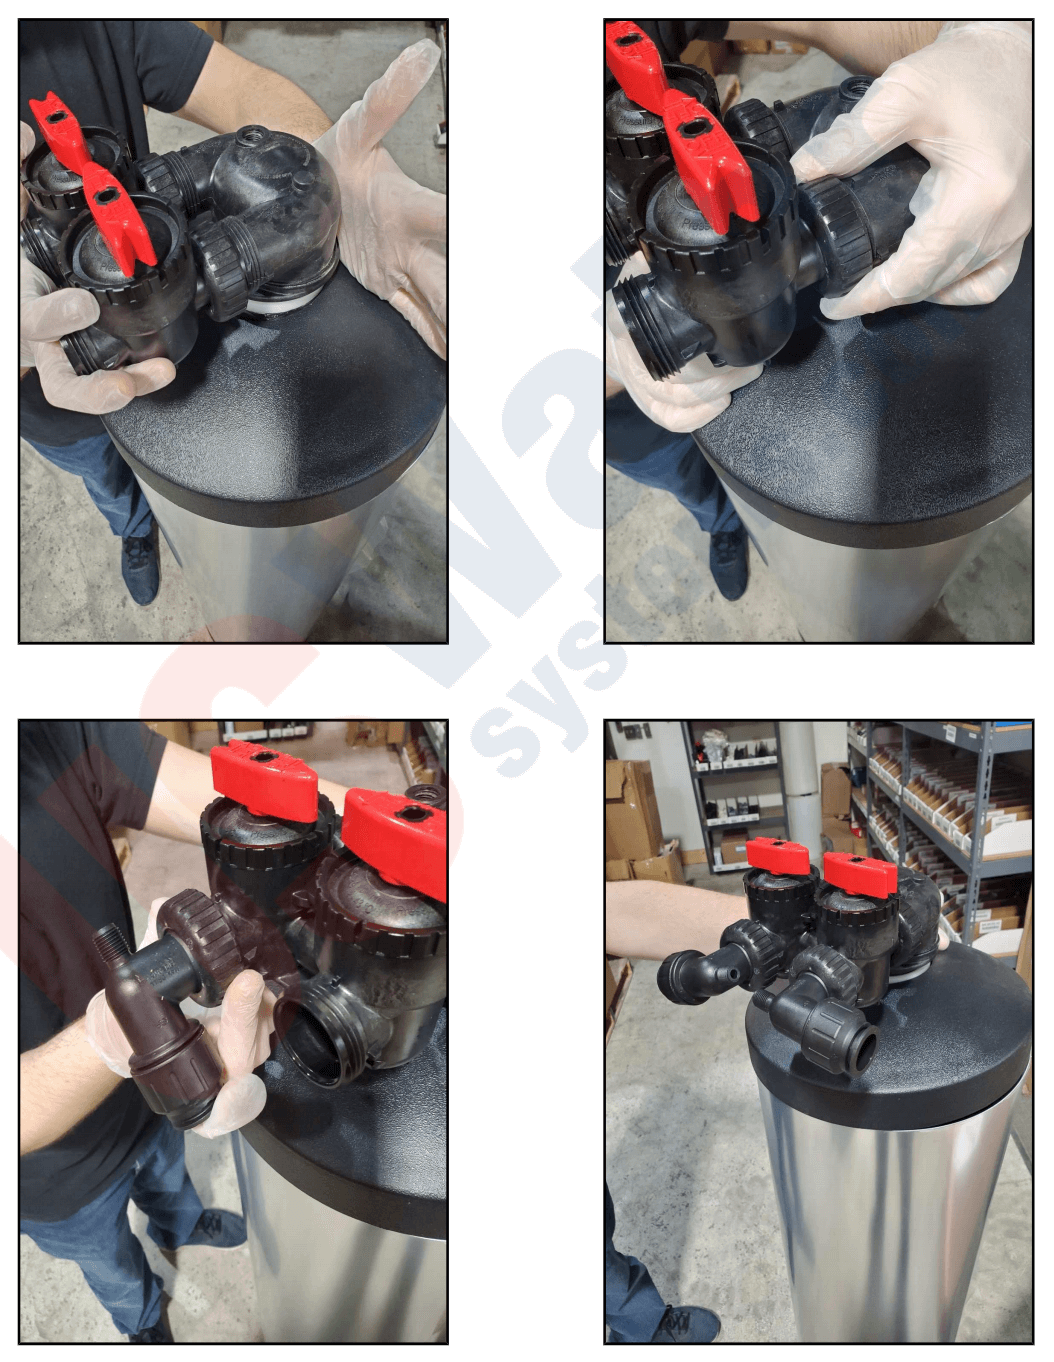
5. Notice that the top of the valve is marked for the plumbing connections. Connect the cold-water supply to the “Up Flow Inlet” of the Salt- Free Water Conditioner's valve.
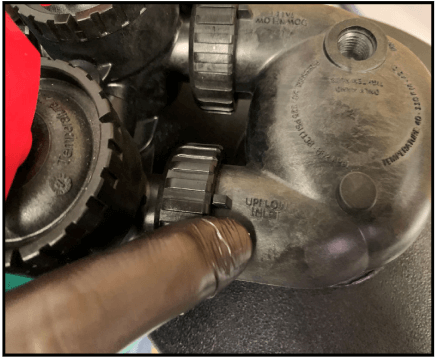
NOTE: The GreenWave operates in the UPFLOW mode, which is the opposite of a conventional water softener.
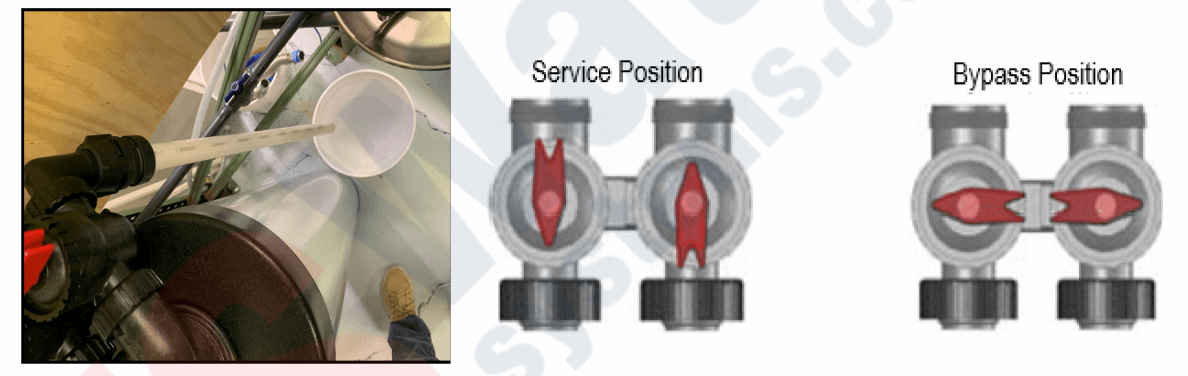
6. Place a bucket under the outlet port (downflow inlet) of the Salt - Free Water Conditioner, or run a line from the outlet port to a drain. Put the bypass in the service position (open).
7. Slowly open the main water supply to the GreenWave system and allow the tank to fill with water. Close the supply water line when a steady stream of CLEAR water comes out of the outlet port.
8. Now that the GreenWave has been flushed, connect the outlet (marked downflow inlet) of the valve to the cold water supply feeding the rest of the home.
9. Open faucets downstream from the GreenWave system to relieve any trapped air.
10. Check for leaks. If there are leaks turn off your water supply and repair them as needed.
Congratulations, you are all done and your GreenWave system is now ready for operation. Depending on your water usage, the media in your GreenWave system should last several years (typically 4 to 6) before you need to worry about changing it. If you have any further questions you can contact tech support on the uswatersystems.com website, or give us a call at 1-800-608-8792.
8 Comments
I have some commercial coffee machines that I am looking into set up a Reverse Osmosis system to strip out all of the hardness in the water. I am considering a sand pre-filter and then an activated charcoal secondary filter ahead of the RO system. Finally I would like to do a storage housing with a ppm dosing phase to add calcium carbonate and a substance to bring a healthy scaling to the water to protect the boilers and valving in the machines.
How many GPD do you need. Here is our most popular system: https://www.uswatersystems.com/us-water-systems-raptor-professional-grade-coffee-shop-reverse-osmosis-system.html I would suggest calling one of our water experts at 800-608-8792.
can you tell me where I can view a video for a salt-free water conditioner unit media replacement? Thanks
Here you go: https://www.youtube.com/watch?v=5G7z-AvD8uU
Where can a maintenance schedule and instructions be found for a salt free water conditioner.
Thanks
Great question! The short answer is it depends on your well water. If you’re on a private well, you’ll need to pre-treat and filter out iron, manganese, hydrogen sulfide, and other contaminants that could foul the media before running it through the salt-free system. Well water can be tricky, so the best move is to get your water tested first. US Water Systems actually offers a professional lab test at uswatersystems.com so their certified water specialists can look at exactly what’s in your water and recommend the right setup for you. Give them a call at 1-800-608-8792, we’ll make sure you get a system that actually works for your situation!